Welcome back, Object Manager student! This is the second OM tutorial, it builds on what we created in Object Manager 101 – where we covered the basics.
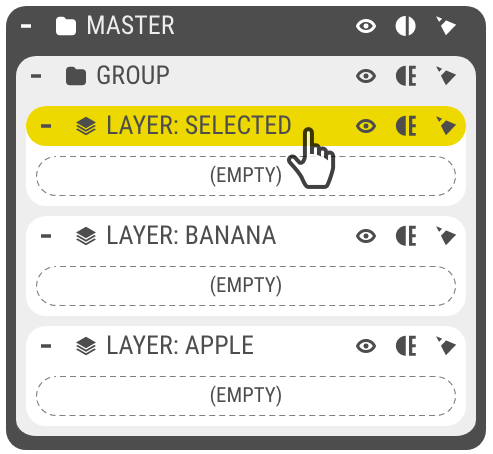
We’ll begin where we left off in OM 101, with a Group containing three Layers, and work towards creating an architectural contest.
Architectural Contest
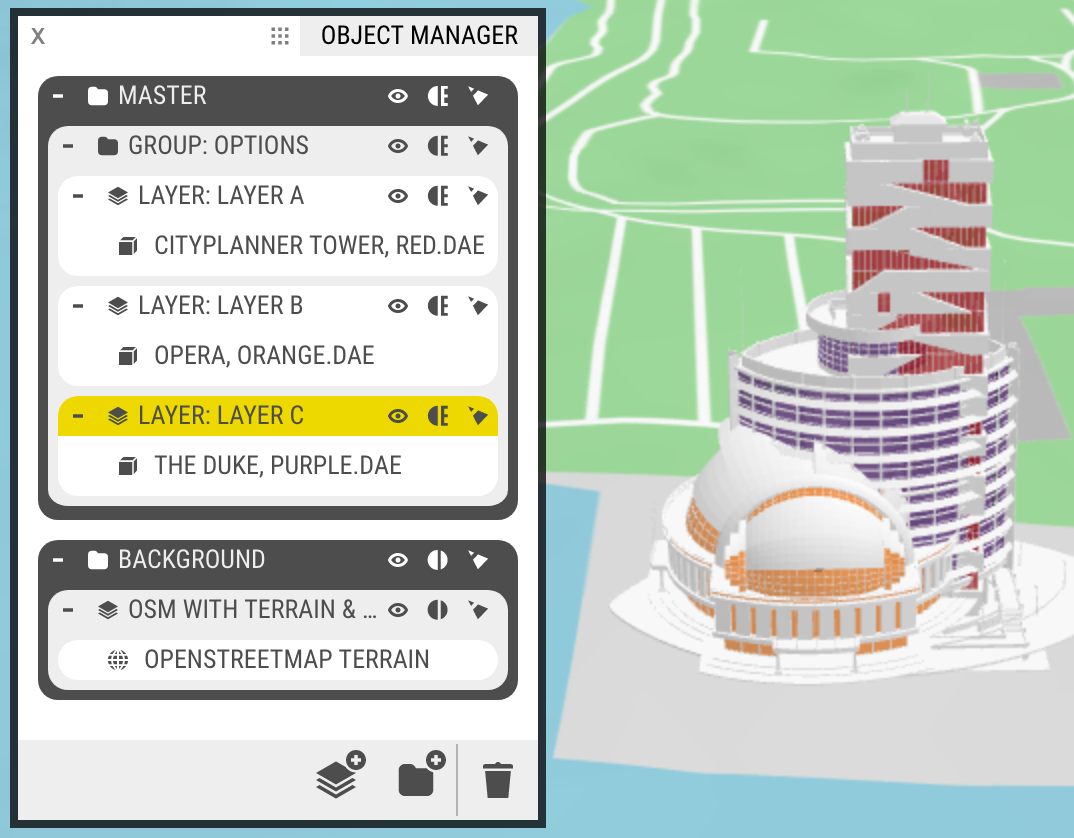
Let’s use Object Manager to organise a real-world example – an Architectural Contest where the viewer will use layer buttons to toggle and compare different 3D Models.
We’ll set up the contest by adding a 3D model to each Layer. Then we’ll set it so only a single Layer is visible at once, and give each a unique look.
First, let’s add the models. You can use your own, or download samples here.
- Select a Layer – Click to select the Layer you’d like to place the object in.
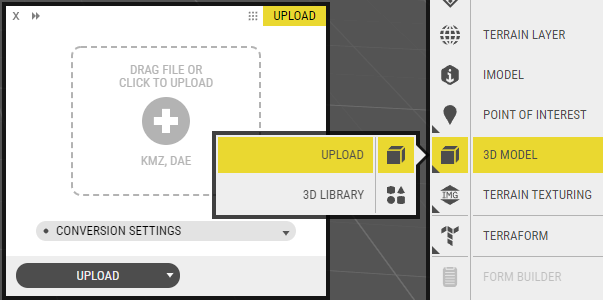
- Upload your 3D Model – Use the 3D Model tool (pictured) or simple Drag & Drop your model into the map
- Position correctly – Click on the uploaded 3D model on the Object Manager and use the 3D Object Tools to position the model in a specific location by opening the Geospatial tab from the dropdown menu. Note: If your model included a geo-location, it may not be visible. In this case, use the position button in the object’s properties window to choose a new location.

- Add the next model to a new Layer – Select an empty Layer, then repeat the steps with a different model. Position the model in the same exact place. Note: Toggle the layer visibility if you do not want to see the original layer/model.
- Add the final model to an empty Layer – Select the third Layer, then repeat the steps with a different model. Position the model in the same exact place.
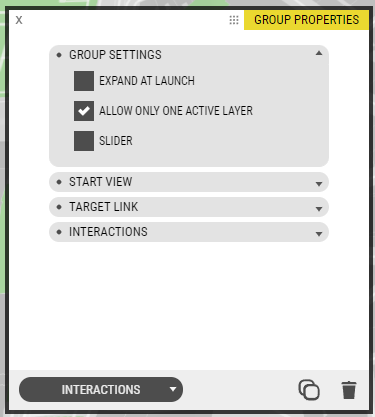
Now we’ll manage the Group settings, to set the Group to only allow one active Layer
- Select your Group – Simply click on it inside of Object Manager.
- Choose the Interactions Tab – In the Properties window, use the tab switcher dropdown menu to switch to Interactions.
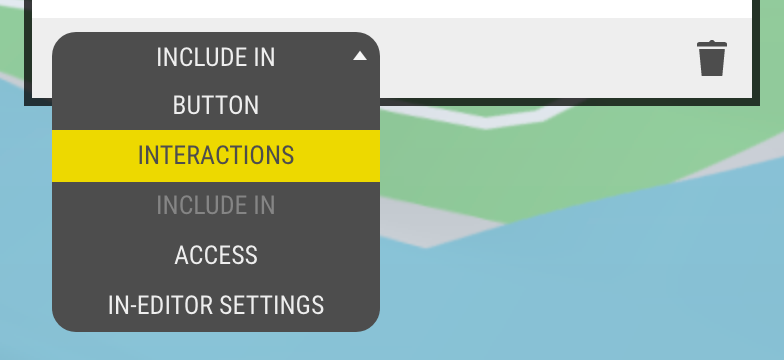
- Turn on “Allow Only One Active Layer” – Click the checkbox to turn this setting on
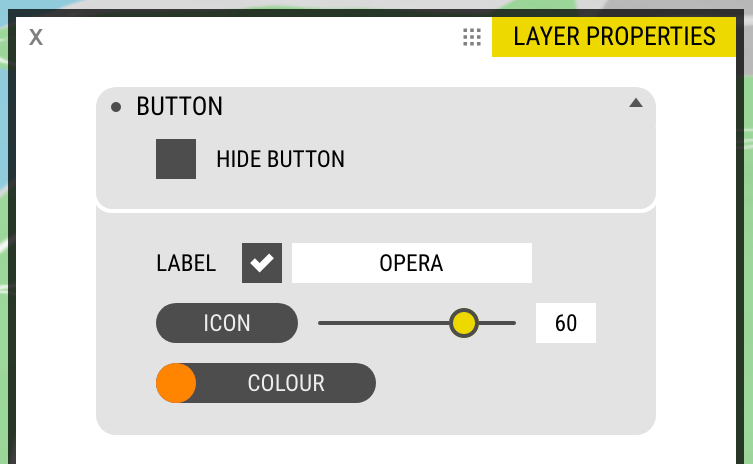
Finally, let’s customise the Group & Layers buttons
- Select a Group or Layer – The Button tab is selected by default
- Fill in a Custom Label – To name each contest entry, add a custom text in the input field
- Set a Custom Colour – Click the Colour button and type in an RGB or Hex colour value, or simply use the sliders to mix your own hue
Achievement Unlocked
Congrats, you’ve made your first Architectural Contest.

One final task, let’s publish the project so you can show your friends and colleagues.
- Set to Public – In Object Manager, click on the Master Group’s Access Setting button. Cycle through the options until it is set to public (the circular icon). The Tooltip will confirm the setting.
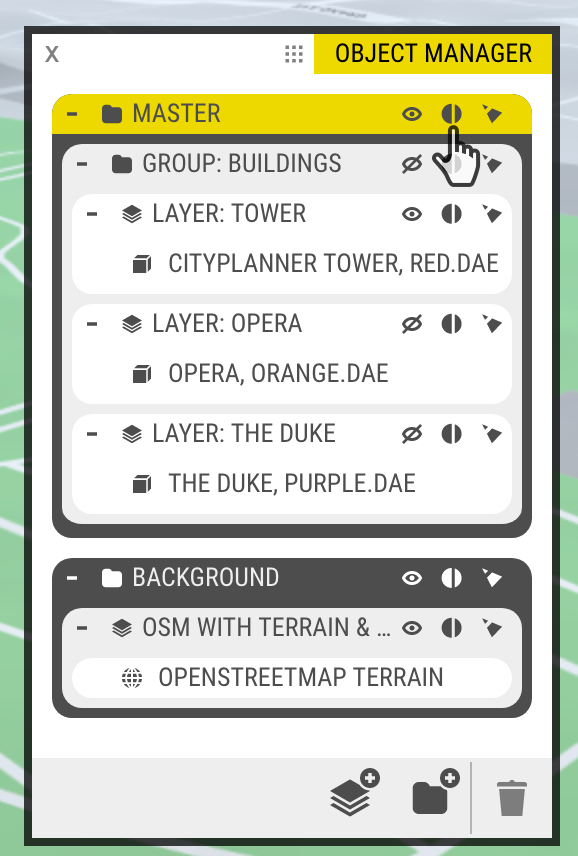
Note: changing a parent’s setting will affect all of its children.
- Open the Publish Window and hit Unpublished to Publish your project. To follow the steps needed, visit Publishing Projects

- Visit the Published Project – In the Web Address section, you can click the Visit button to open the Published view.
How does it look? Compare it to Agency9’s example: Object Manager 101: Architectural Contest
See a few differences? Try to apply what you have learned in order to:
- Set the Group to be expanded on launch
- Set a Layer to be on by default
- Add custom icons to your Group & Layers