Publishing an OpenCities Planner project creates a web link that anyone on the internet can access. Here’s what you need to know to get started with Publishing.
Publishing Projects
Access Settings
It is critical to understand Access Settings if you plan to publish. There are four options that determine who is able to view your project.
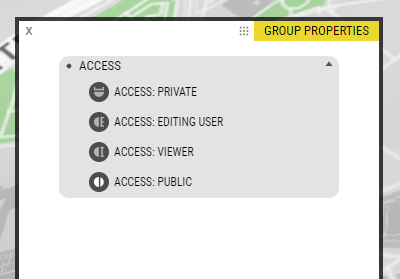
Only items which are set to Public will be visible on the published link.
Every Little Step
Finally, here are instructions you need to follow in order to publish your project.
- Review Access Settings – In Object Manager, check that the Access settings reflect your intentions. Everything you want to be seen needs to be set to Public. Toggle to the circle icon.
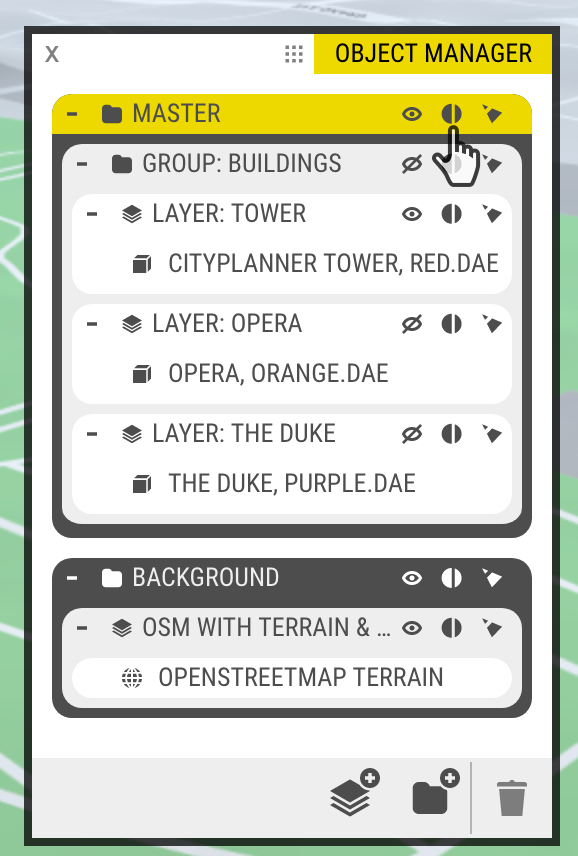
Note: changing a parent’s setting will affect all of its children. - Open the Publish Window – You can open it by clicking on Unpublished.

- On the Publishing Window, toggle the bar to the right so you can generate a public Url. Once your project is published, you can easily modify the web address as well as Visit or Copy the Url Link, and Embed it.


- Url Name: Here you can customize how the name of your project will appear on the published Url.
- Web View – In this section, you can modify the published URL that visitors will use to access your project. Don’t forget to save, there’s a shortcut Save button right here in this section.
- Visit – Click the Visit button to quickly review the live site.
- Copy Link – Copy the link from the Web Address section and paste it wherever you’d like.
- Embed Code – Copy the Embed Code if you want to install the published OpenCities Planner project on another website.
Well done, your project is now live on the world wide web!