OpenCities Planner is totally customisable. In this tutorial, we’ll learn about Icons, Labels, and the different kinds of Buttons
There are two methods of selecting buttons to edit. You can do so via the Project Bar interface or by using Edit Tool.
Edit Tool is quickest and very intuitive, so you may want to familiarise yourself with the View & Edit Tools Tutorial before proceeding.
We’ll start with reference, then give some tasks to practice what you’ve learned.
Ribbon
Navigating to the Ribbon tab
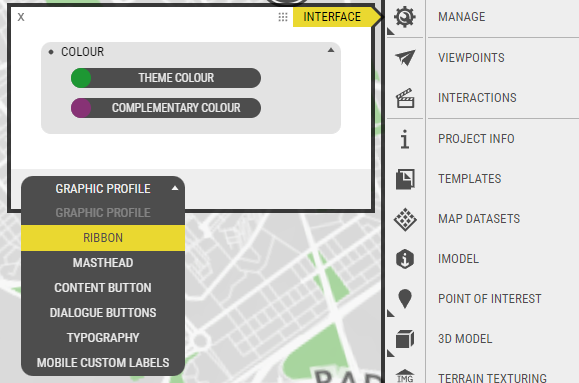
We’ll start with the main part of our interface – The Ribbon. To edit any button, you can switch to Edit Tool and simply click the button you want to modify or open the Ribbon tab of the Interface window which you’ll find here:
PROTIP
Perhaps the most important thing you can edit are the Ribbon button labels.
Each available Ribbon button has a ‘section’ where you can edit whatever is editable.
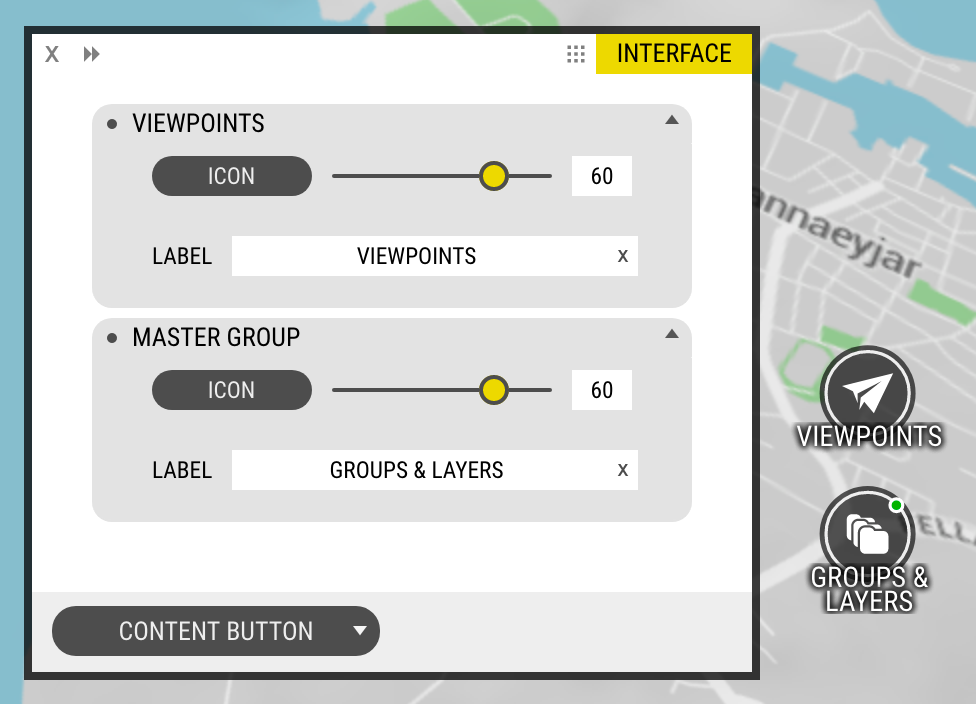
Interface Window, Ribbon tab
You can hide extraneous buttons or customise them to suit your project. In the above example, we’ve edited the icons and labels.
PROTIP
Stuck with a long line? Use <br> to form a line break.
Content Buttons
Content Buttons – occasionally referred to as Circle Buttons – live on the right side of Project View.
Groups and Layers are edited individually. You can click-to-edit them directly withEdit Tool, or choose them fromObject Manager to open their Properties Windows.
However, there are a few Special Content Buttons that can only be edited from the Interface window. Find them here:
Editing the Special Content Buttons
These buttons appear when there are multiple Viewpoints or Group/Layer Buttons and they cannot fit on the screen.
Tools
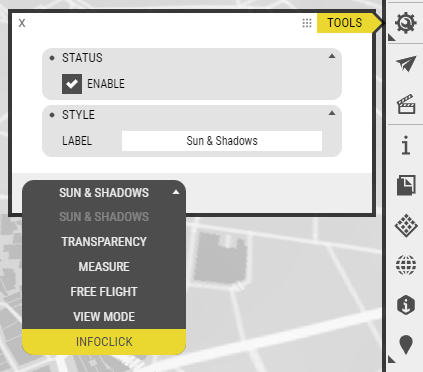
Tools is kind of a big deal – so it has its own dedicated Window. Each Tool serves as a tab where you can toggle availability or customise the icon and label.
Tools Window & Tabs
Your Mission
You’ve learned everything you need to know to edit the main interface buttons.
Here’s are a few tasks to help reenforce what you’ve learned
Remove Project Info from the Ribbon
Edit the Ribbon Content button, change the icon and label. If your new label is two words, use a line break. Reminder: <br>
Create multiple Viewpoints, then choose a custom icon for and rename the Special Content Button
Hide the Transparency and 2D/3D Tools from the View Mode
Rename the remaining Tools – and give them new icons