iTwin Synchronizer
Introduction
Before you open the iTwins Synchronizer app that you have installed, make sure that your user is a member of the ProjectWise project you are uploading your models to. Click here to see how it’s done.
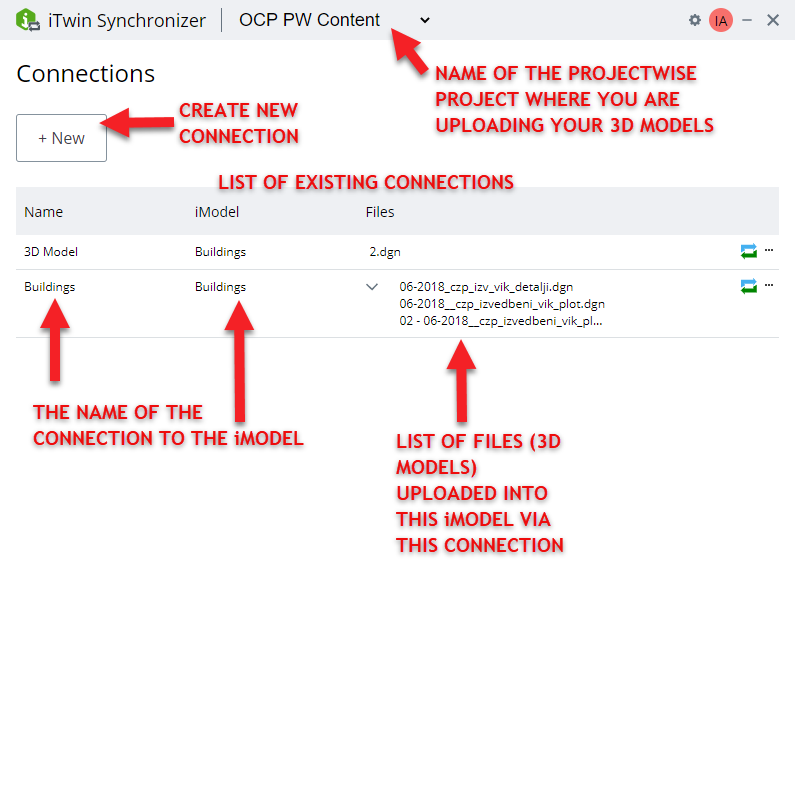
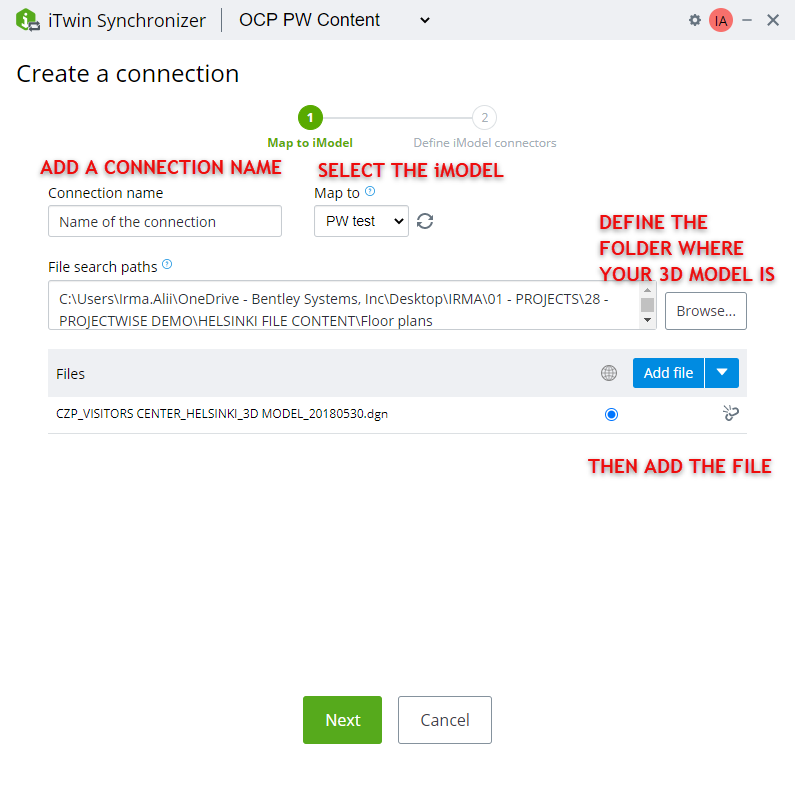
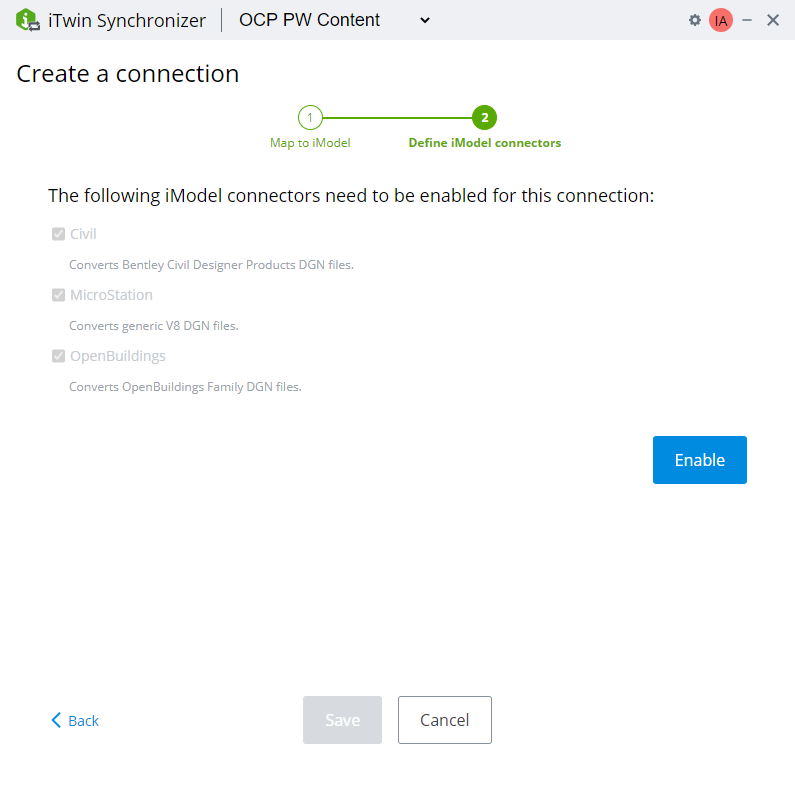
Open the iTwins Syncronizer and select the ProjectWise project you want to work with. Note that now you are creating a CONNECTION to your iModels. You can not create iModels from here nor delete them, that has to be done from the iModel Manager in the Connect Center. Here you can edit and delete connections to a specific iModel.
PROTIP
You can create as many connections to the iModel as you want.
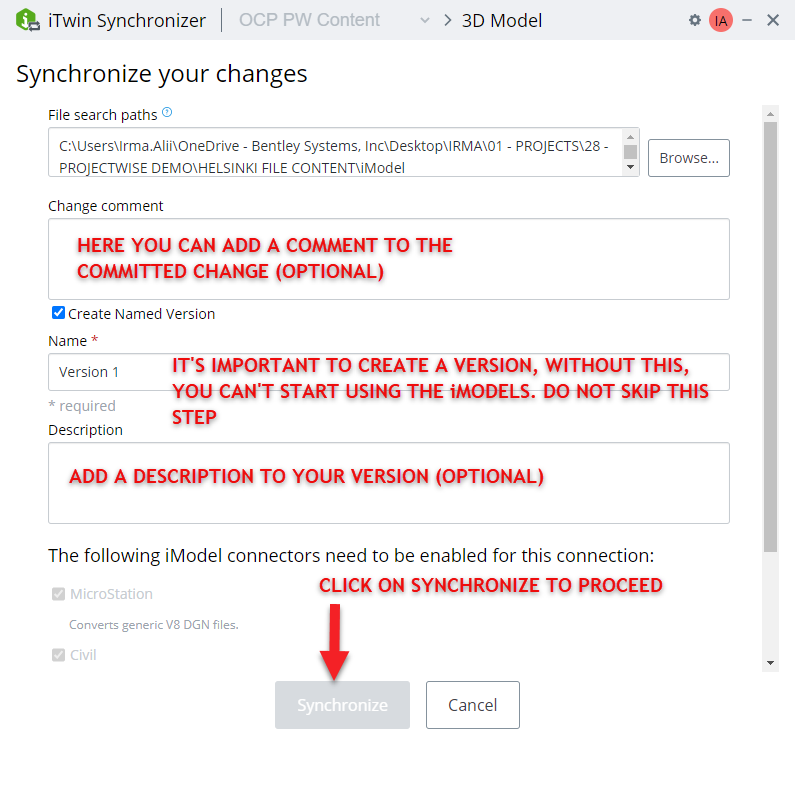
In this step you are creating a version to your connection. The versions are useful if you want to change content in you iModel. For instance, in Version 1 you can have 1 dwg file but in Version 2 you can have the same dwg file and a BIM model. You can add and remove models without having to create a new iModel, all you need to do is create a new version. Each version is then stored in the iModel Manager and you can always choose a previous version to work with.
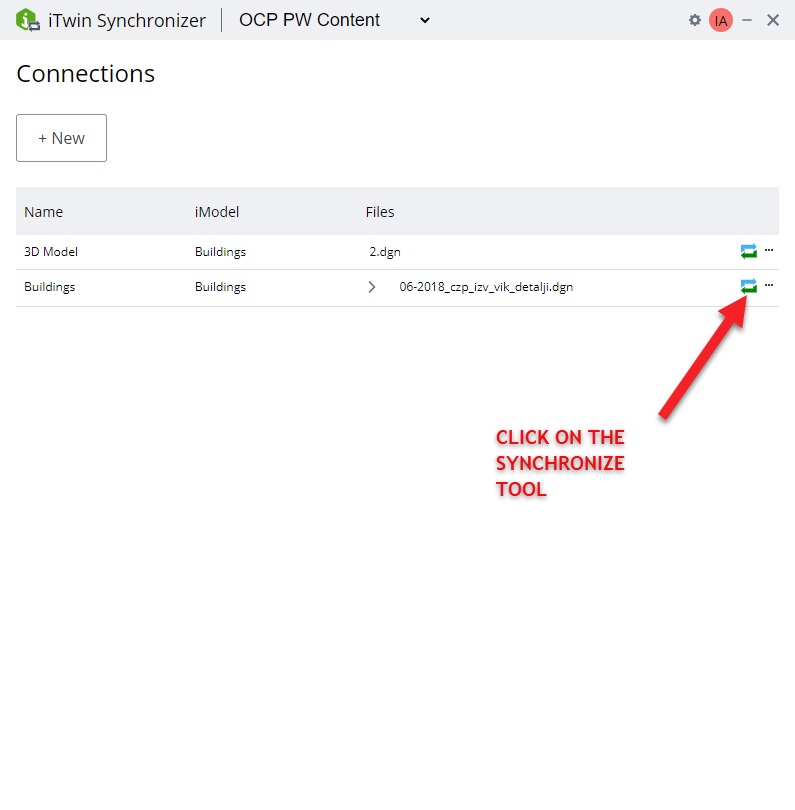
When your iModel has been synced, you can go to the Connect Center to view it in Design Review or you can go to OpenCities Planner and import the iModel in a project.
Back to the Upload options.
Back to the iModel start page.
