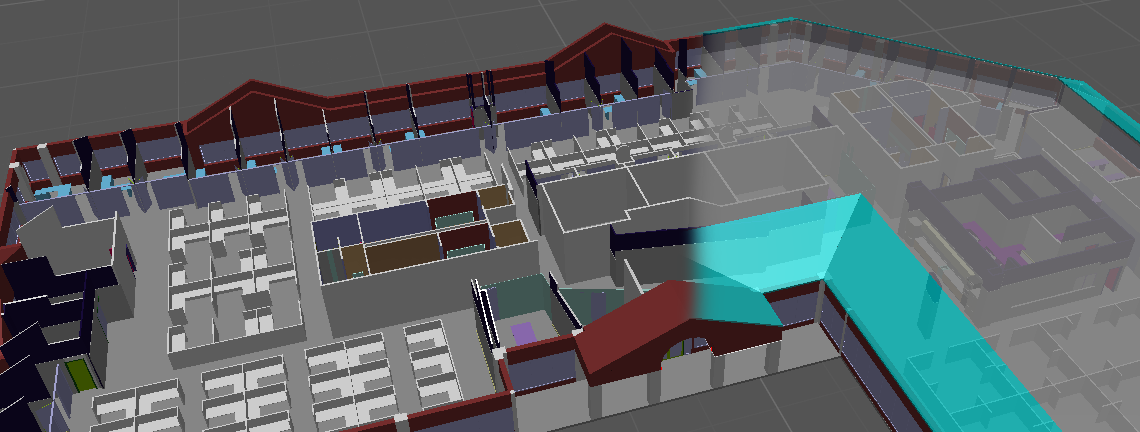
OpenCities Planner now has the ability to render iModel content together with existing project data.
Configuring iModels in OCP
What is an iModel?
An iModel is a distributed relational database holding information about an infrastructure asset. iModels may contain physical and functional models, drawings, specifications, analytical models, etc.
iModels are stored in the iModelHub and can be uploaded using the iTwin Synchronizer tool from your prefered choice of CAD and BIM applications.
For more information about iModel, iModel.js, iModelHub and iTwin Synchronizer visit these links:
iModel – The data format
iModel.js – Open Source software for rendering iModels
iModelHub – Cloud storage platform for iModels
iTwin Synchronizer – Software for synchronizing data to iModels on iModelHub
Accessing iModels in the Editor
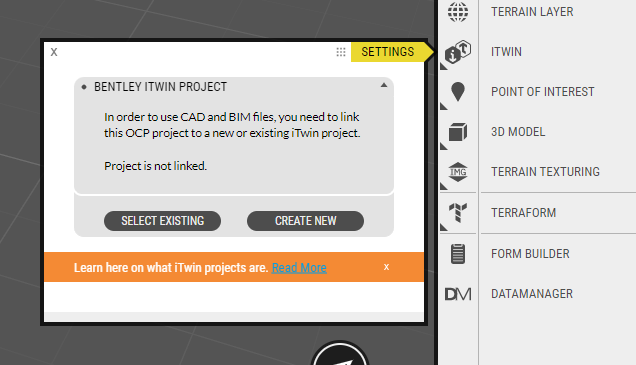
First step to configure any iModel to your OpenCities project, is to start by linking it to a Connect project that contains the iModels or create a new Connect project through the OpenCities interface.
Find the iTwin button on the sidebar and choose Settings.

Here you can specify whether you want to link your OpenCities project to an Existing Connect project, or create a New one and link it to your OpenCities project.
iTwin.js powered rendering
Once a User establishes a connection with either an Existing Connect project or a New one, a confirmation window will appear asking the User to switch to the iTwin.js renderer.
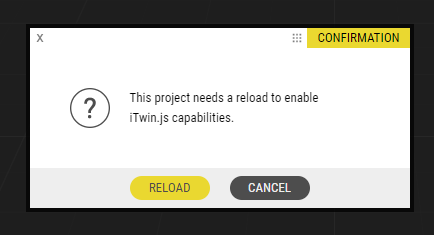
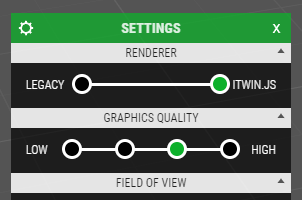
By switching to iTwin.js, the project will now support rendering of iModels. However, some features, eg. Shadow Analysis, Export 3D, and Export Video, are not yet supported in this mode and are therefore disabled. The User can toggle between the two different rendering modes using the Graphics Settings found in the bottom left corner.
Click Reload and then make the connection to an Existing Connect project or create one.
Assign a Connect Project
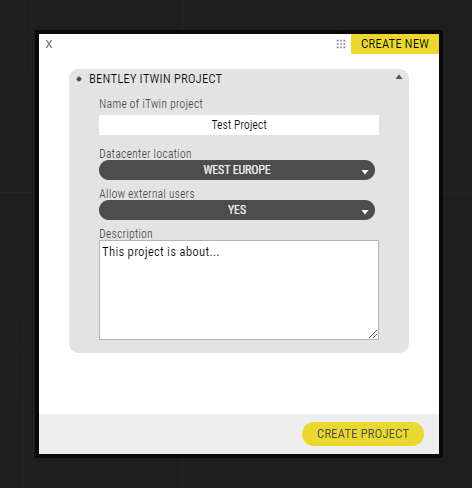
Create a new Connect Project
Give your project a name, select which datacenter you want to host the content on, specify whether you want to allow access to external Users outside of your organization on Connect or not, and finally add Description. This will create a New Connect project that you can then link to your OpenCities project.
Select Existing
By selecting an Existing Connect project, you will get a list of all the Connect projects you have access to. You can filter and find the Connect project you’re looking for, pick it from the list, and hit Select Existing to make the connection.
Keep in mind that you need to be an Administrator of these Connect projects in order to see them listed here.

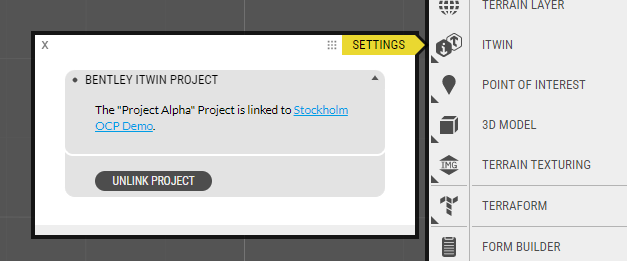
When the configuration is established, under the Settings page you can visit the Connect project by clicking on the link which will then open that project in the Connect Bentley portal. You can also choose Unlink Project if you want to terminate the connection.
Assign Roles to your Project Members
By establishing a connection between an OpenCities and a Connect project, you reduce the need to re-invite Users that already exist in one of these projects. You can simply add Roles to your OpenCities project, and all included Users there will be imported automatically.
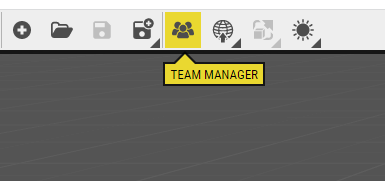
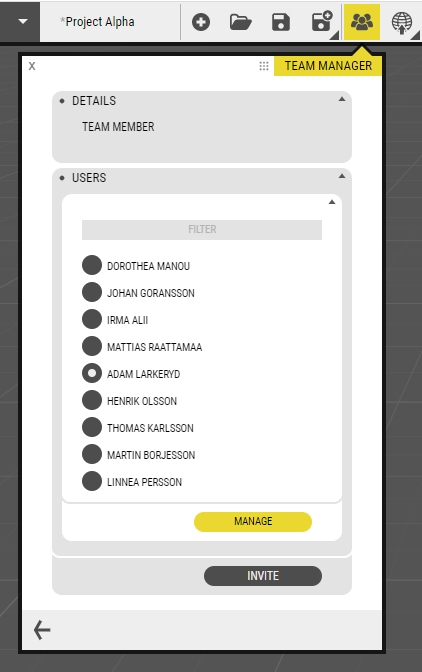
Click on Team manager in the Top Bar. Here you select which Roles from the Connect project you want to provide access to in your OpenCities project.
Existing
Click on Existing, and a list appears here with all User Roles existing in the Connect project.
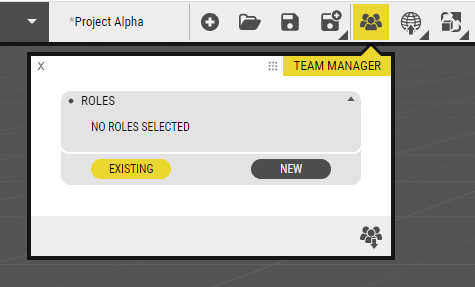
These Roles represent all categories of people having access to the Connect project. Pick the Roles you want to add to your OpenCities project and return to the previous window by hitting the arrow on the bottom left corner you find here. OpenCities will automatically bring all the Users of these roles.

At this point, OpenCities is trying to import those Connect Users that are not already Users in your instance. This is a prerequisite; Users must be defined on the instance to work in any OpenCities project.
When the import is complete, under Roles you will now have listed all the imported Roles from the Connect project, with all their respective users. Pick a Role and open its dropdown list. The users will appear here. Choose Edit so you can start managing the Users.

Pick any User from the list and then select Manage.
User Management window will open. Depending on the actual User’s rights on the OpenCities Instance, you can assign what rights will this User hold on your project, Viewing or Editing rights, or even be an Administrator of the project. You can even choose to delete a User from this list.

The Roles are a ‘one-to-one’ type of user management. After an established synchronization between an OpenCities to a Connect project, any changes made to the Roles will affect both environments. This means that Users list in both OpenCities and Connect project, will be updated accordingly.
You can invite Users to the project you have created that are already defined in your Instance and assign them any Role you have imported from the Connect project. You can even create a new custom Role here and invite Users under this.

Every new Role created in either the OpenCities or the Connect project, will appear in both environments. In Connect, the default Roles are Team Member and Project Administrator.
If there are any new updates on the Users on the Connect project, you will receive a confirmation message while you access the Team Manager, asking you if you want to sync them to your OpenCities project.

Adding an iModel to your scene
After the connection is established, you can add an iModel to your project and you will also be able to access it in the Object manager.
Upload or Drag and drop your files
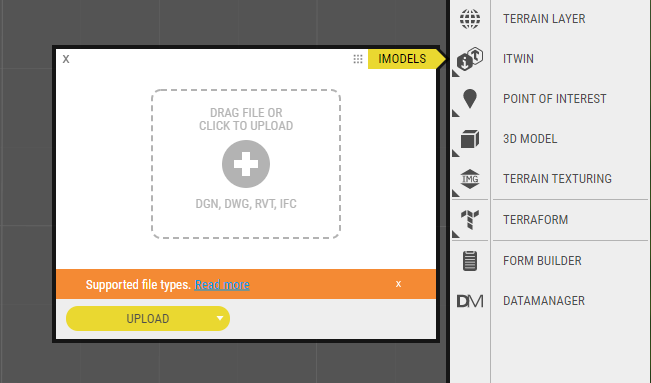
Find iTwin button in the sidebar and choose iModels in the popup window.

Here, the Upload option is set by default. You can either choose to upload your files by hitting the plus icon or simply drag an IFC, DWG, DGN, Revit (and more) file from your file system and just drop it on the OpenCities Editor interface.
By changing the option to iModels on the dropdown menu, you will have all the iModels of the Connect project you have established a connection with, listed here automatically.
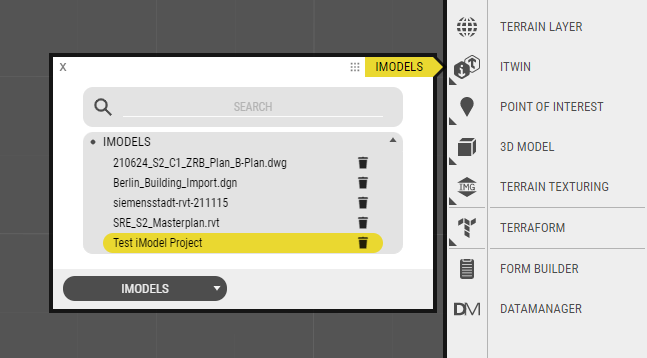
Choose which iModel you want to use, and when the process of uploading the iModels is complete, the iModel window will appear, with the Settings section open by default.
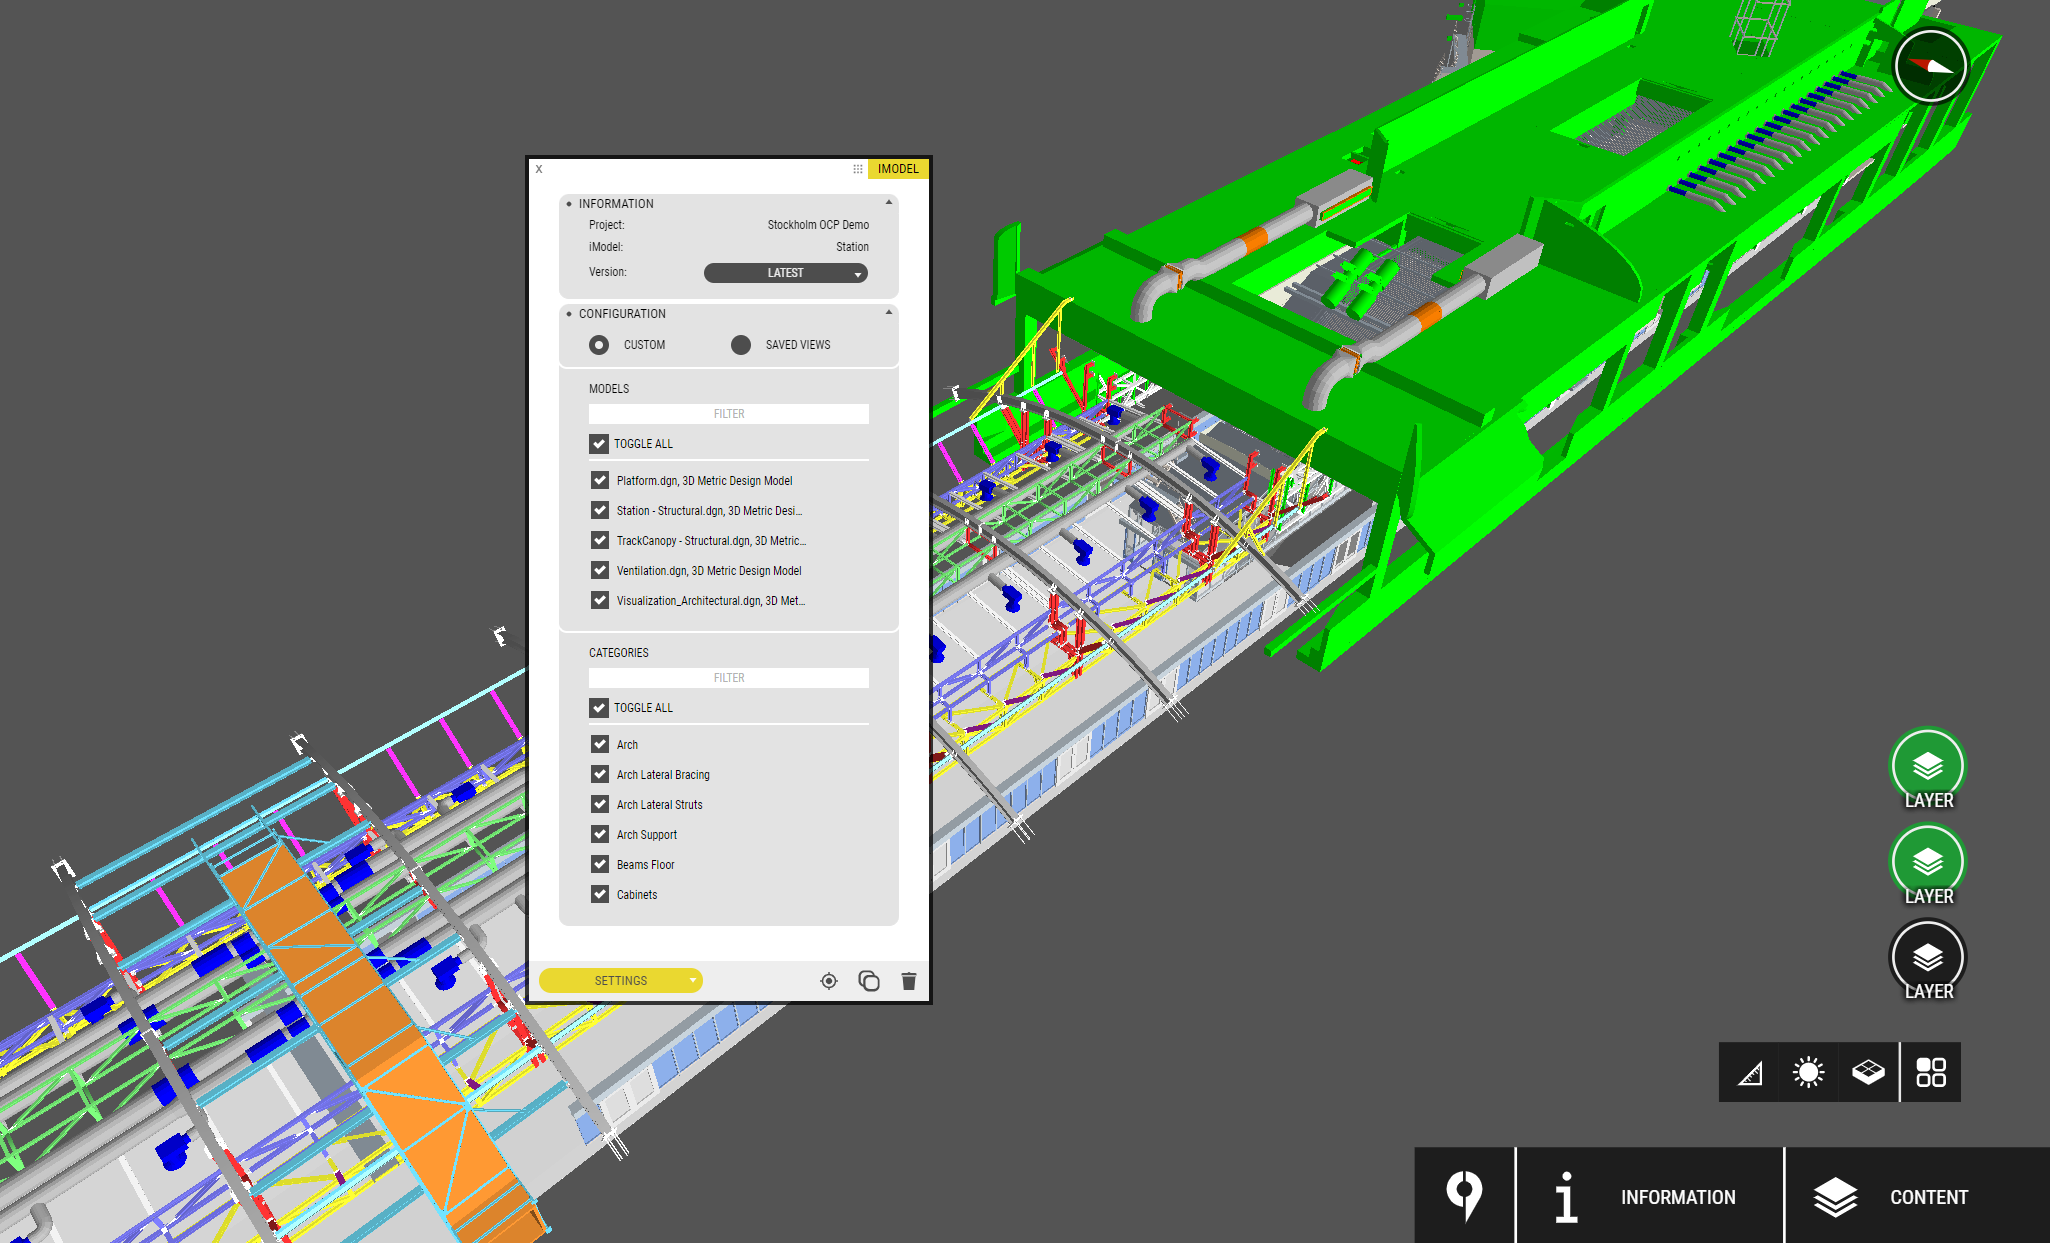
In the iModel Settings window, you can see the information of the iModel and choose which iModel Version you want to use. We recommend setting this to Latest and always use the latest version of your iModel, or you can easily choose one of the other Versions listed here. If Version is not set to Latest, you can always come here and pick any existing or newly created Version you wish, without having to configure the iModel once more.

PROTIP
After adding the iModel you might not see it on the screen at first since it could be placed at a different location than the camera is currently viewing.
Use the “Navigate to Object” button  to move the camera to where your iModel is.
Configuring the iModel
From the same iModel setting Window, you can configure which parts of your iModels you want.
An iModel consists of a collection of smaller parts called Models, these can be different .dgn or .rvt files that you added to one iModel (eg. building.dgn or bridge.rvt). A Model is subdivided into individual Categories, all Categories represent levels or layers in your .dgn/.rvt files (eg. Beam Structure A02). When an iModel is added to the scene, the default behavior is to show all Models and Categories. But this can later be reconfigured if only parts of the iModel are needed.
Custom Configuration
You can manually configure exactly what you want to include in this iModel by checking/unchecking the checkboxes under Models and Categories. The iModel in the scene will automatically update when you toggle these settings.

Configure using an existing Saved View
Usually, the iModel has a collection of pre-defined configurations imported from the original CAD/BIM source file. These are stored in the iModel as Saved Views. To load a Saved View, select one from the dropdown menus and then click Load. Once loaded, the Model and Category checkboxes will be set accordingly. If you also want to move the camera to the location defined in the Saved View, use the Visit button.

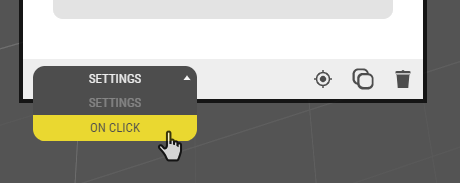
Show Element attributes on click
In iModel On Click setting, you can select an action that will occur when the user clicks an Element of the iModel. A common use case is that we want to list all attributes connected to this Element.
Begin with selecting On Click and then choose Attributes as the action.
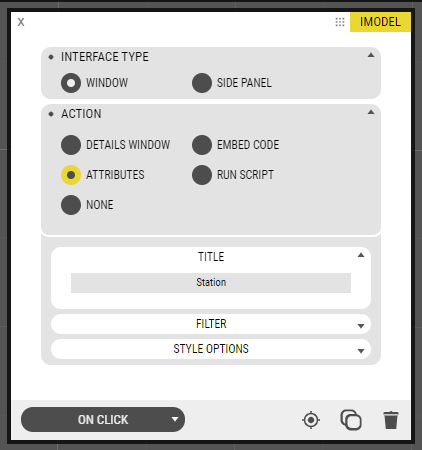
Now, when the user clicks on an Element of the iModel, a popup will appear listing all attributes.
You can also access the attributes in plain text by using the syntax ${attributes.User Label}, where “User Label” is the attribute you want to expose.

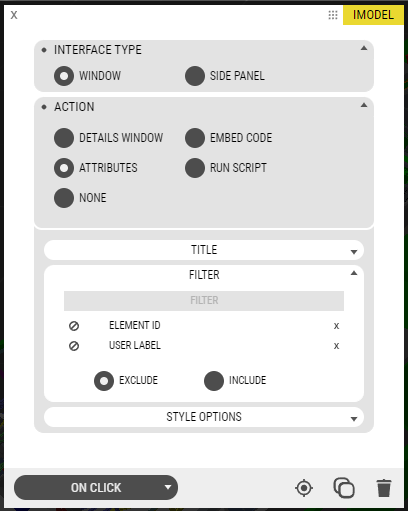
If you only want to include or exclude some of the attributes, use the Filter setting.
Coordinate Systems and GeoLocation
If you want to combine the iModel with an existing Map Dataset you need to make sure that the project has the same Coordinate System as the Map Dataset you are using. If for example your Map Dataset is defined in EPSG:3857, set this as the project Coordinate System like this:
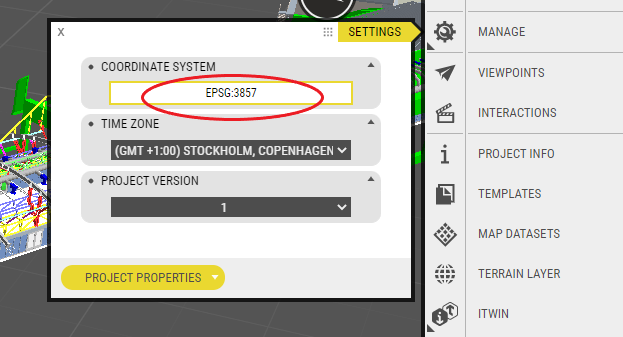
Then save the project, now the iModel should line up with the Map Dataset.
Limitations
Limitations in the current release are:
- Features like Export 3D, Export Video and Shadow Analysis are not available for iModels.
Requires Premium Instance subscription