Connect to a WMS/WCS and create layers
WMS – Web Map Service (imagery data)
WCS – Web Coverage Service (height data)
If you want to render aerial imagery with height data from an online service, you can connect to WMS for imagery and WCS for height data. Note that you can’t visualize WCS without an ortho/aerial imagery or a fixed color source.
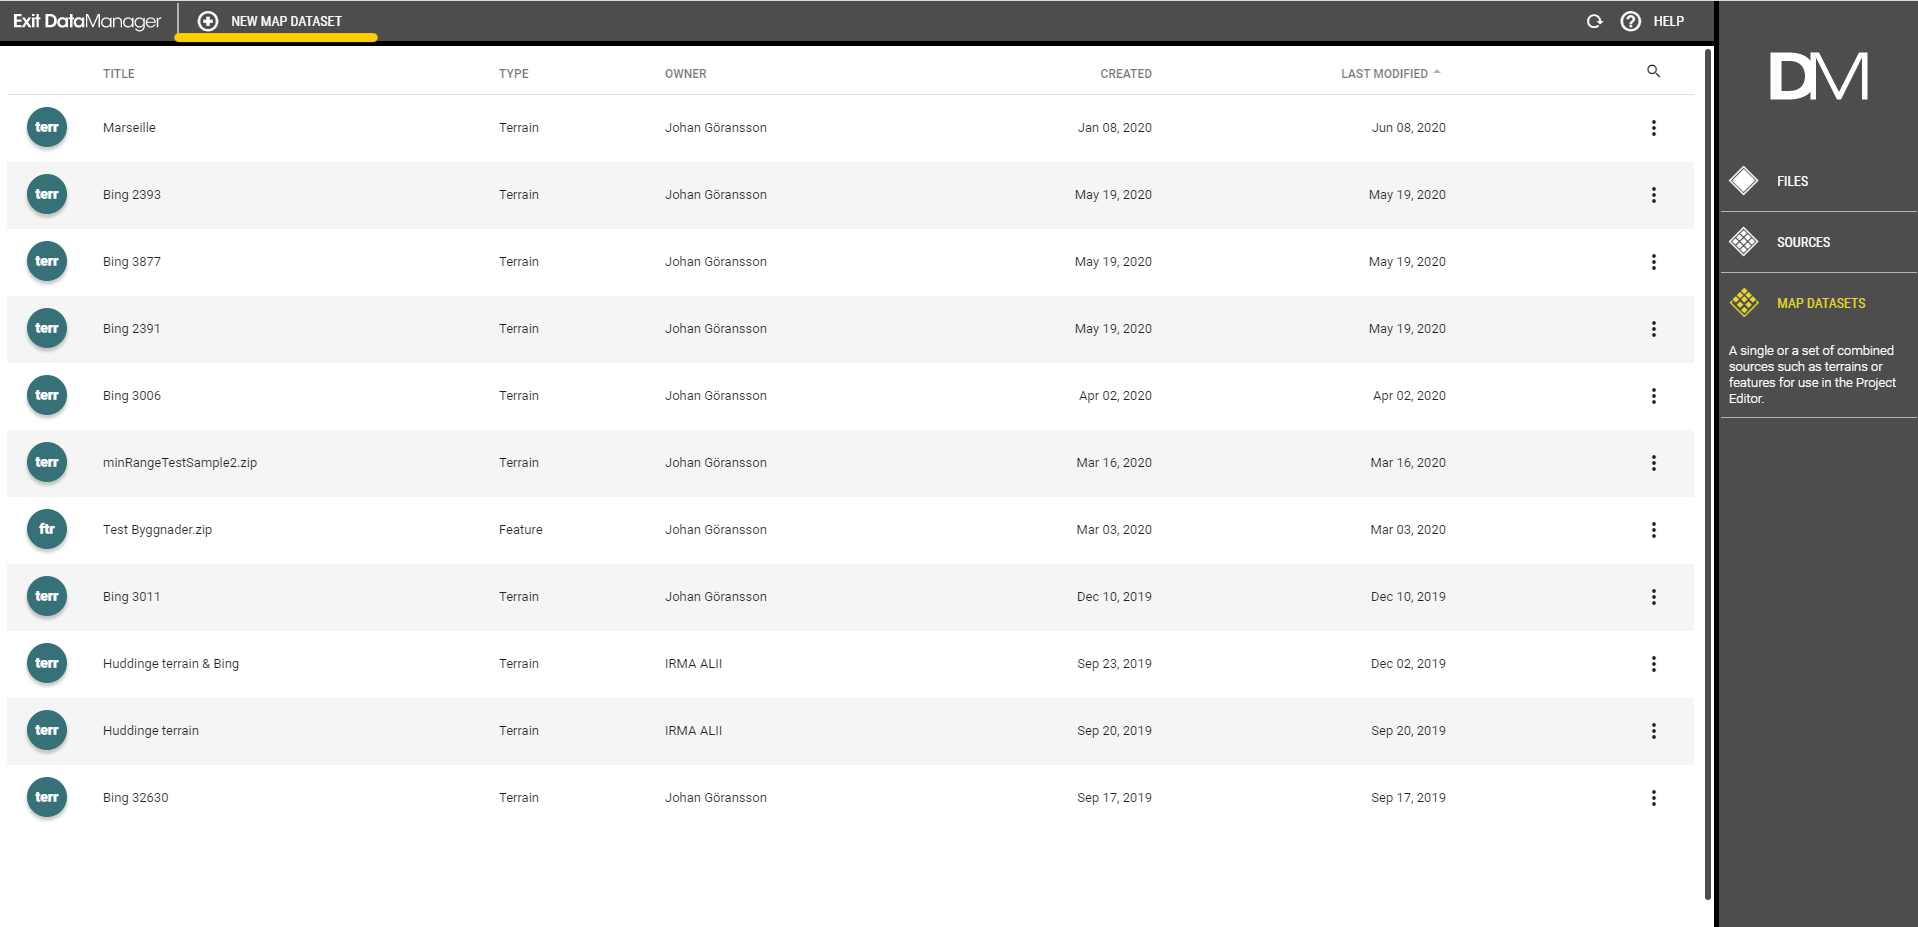
Start by opening DataManager and on the right side panel, choose “Sources”. We are going to start by creating a source with a WMS layer and another one with a WCS layer. After that we will connect them both into one Map Dataset. On the top ribbon select “New Source”, in the pop-up window configure the settings (give the source a name, enter the coordinate system and under type, choose Terrain/Imagery/Reality model). In the next step, choose WMS as input type. After that enter the required information in order to connect to the service and click on “Load capabilities”.
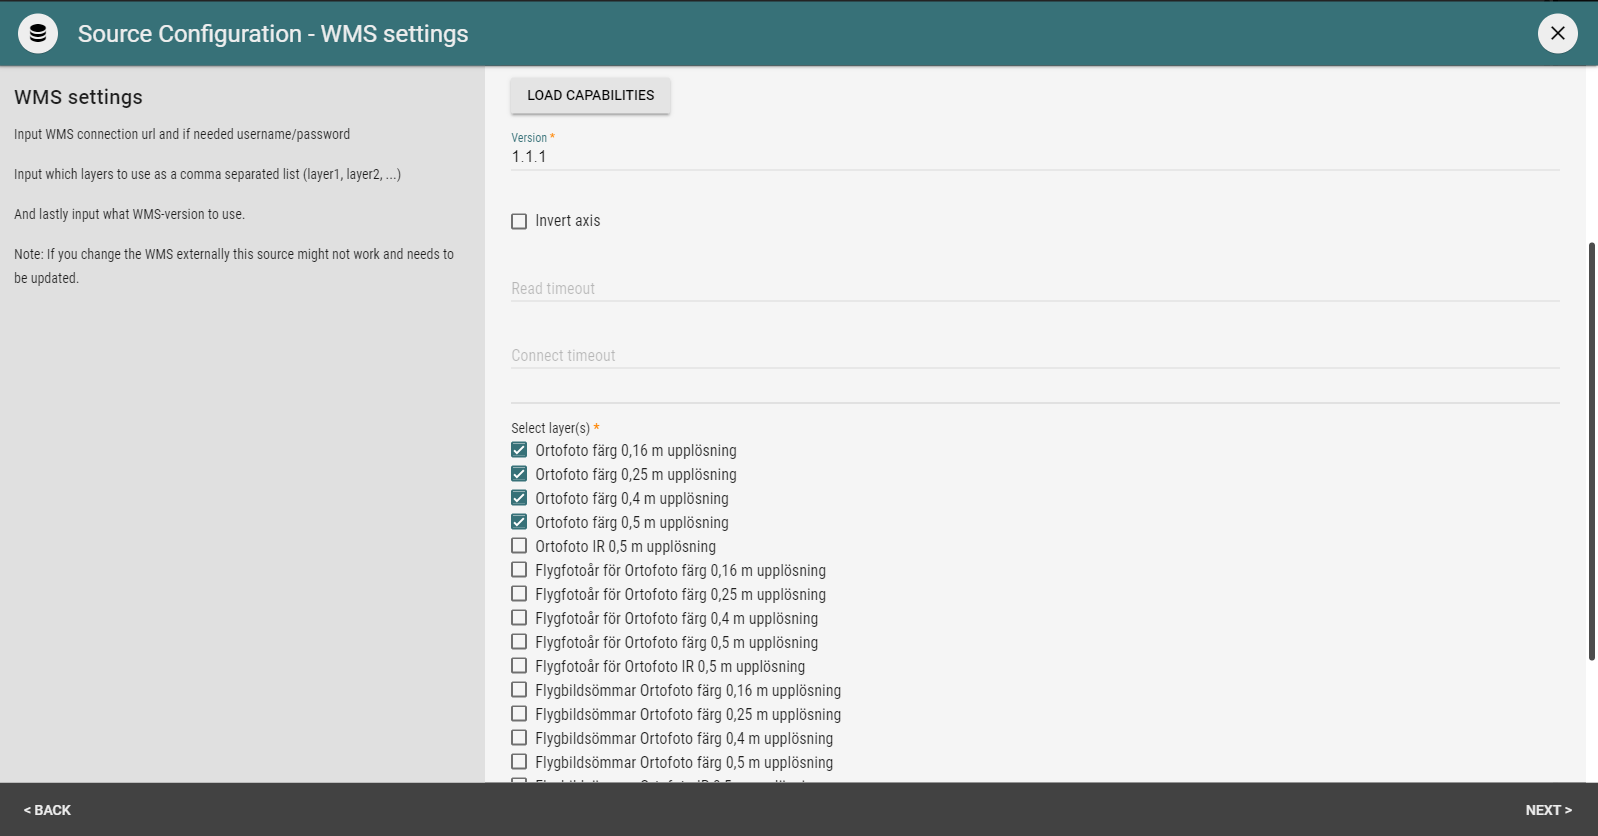
Once the capabilities are loaded, you can change the version (we recommend you keep the default), Invert axis, add a Read timeout value and a Connect timeout value.
Invert axis – sometimes WMS/WCS inverts the X/Y axis. In order for your data to be displayed correctly, you might need to invert it.
Read timeout – this value defines how long DataManager should wait for data to return (if it stopped) from the WMS/WCS-server
Connect timeout – this value defines how long DataManager should wait for until a connection is established with the WMS/WCS.
Both of the timeout values should be added in milliseconds. If you don’t set a value, it will default to 60 seconds for connect timeout and 60 seconds for read timeout.
Select the layers you want to display from the service and choose the format. Once you’re done, click next.
On the next page, you can change the Title, EPSG and add a Meter Per Pixel value.

Adding a bounding box is optional if you want to set the maximum area of the source, if you don’t set a value, it DataManager will automatically calculate the bounds. Add a No Data value if there is a pixel value (color in HEX code) that you don’t want to display in your source. Add a mask if you don’t want to display an area inside or outside of the source. You can edit these feature or just click next to finish the process.
Once you’re done, you will create a source and see it in your source list. The next step is to create a WCS source in a similar way.
Start by clicking on “New source” on the top ribbon. In the pop-up give your source a name, EPSG and select DTM/DSM as a type (since now we are working with height data). Click next and select WCS as the input type. Add the credentials to connect to the service and click “Load capabilities”. Similar to WMS, here you can change the version, invert the axis, add a read and connect timeout value, select the layers and format. Once you’re done, click next and configure the last steps.
The settings in this window are the same as WMS except that the No data value refers to height data, this means you can add a height value you don’t want to display in the source.
After clicking on next, you will have 2 new sources; WMS and a WCS. Now let’s connect them into 1 Map Dataset.
Select the Map Dataset on the side panel and on the top ribbon click on “New Map Dataset”
In the pop-up window, give the Map Dataset (MD) a name, coordinate system (it can be different from one in the Source), and choose Terrain/Imagery/Reality model as a type. Click next and in the following source list, select the 2 sources (WMS&WCS) and click next. In the last steps you can configure the bounding box and visualization (LOD settings) or you can leave it as is and click next. Once your MD is created, click on the eye icon to preview your new data.

If you are satisfied with what you see, you are done. Now you can use your Dataset in the editor by picking it from Map Datasets.
Troubleshooting
You may experience issues with your WMS layers if the service supplier is running through an update or errors. This can result in your WMS layers not showing correctly or showing just parts of it. Read here on how to solve this.