3D-models can be created in the most common CAD, BIM and 3D authoring tools such as AutoCAD, Microstation, 3DStudio, Maya, Sketchup, Blender and more, and uploaded to the 3D-world in OpenCities Planner. You can read more here about how to prepare your 3D-models for OpenCities Planner in 3D modeling for OpenCities Planner.

  • Formats
    OpenCities Planner supports the KMZ and DAE (Collada) file formats. The 3D-models can be textured or just plain color materials. If you use DAE with textures, then make sure to include the textures when you upload or add the DAE and textures into a zip file which you then upload.
  • Uploading
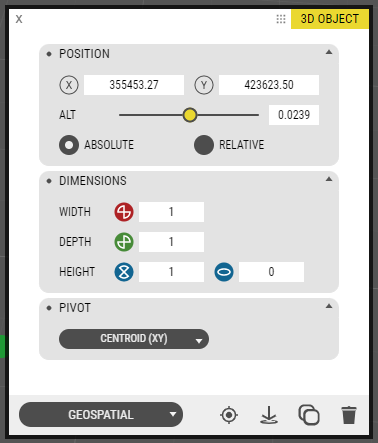
    To upload, click the plus icon in the 3D-models tool window or drag and drop models from the hard drive to the window. You can also drag and drop files directly on the project view to upload them. After upload, the 3d-model is selected in the 3D-world. You can upload several files simultaneously.

KMZ Uploads

Note:

You might experience that your model is flattened or too wide after importing as a KMZ. The reason is because your model is not georeferenced correctly. KMZ files are by default always georeferenced in WGS84, which covers the whole world. Let’s say you are using a local coordinate system in OCP and you want to upload your model in Stockholm, Sweden. You will need to manually move the KMZ model to the Stockholm area in the world map for it not to get deformed.

To fix this issue, either:

  1. Georeference your model to the area you want to place it in, using Sketchups georeferencing tool
  2. Export as Collada (remember to zip the exported .dae file and all the textures)

Geospatial
Georeferencing and dimensions is set in the geospatial settings. You can set the altitude mode to be absolute or relative to the ground. Rotation and dimensions can be set in the text fields or using the object tool directly on the selected object. This window has Find and Place tools on the bottom. The Find tool will center the camera on the object. The Place tool is a way of positioning your object in the view. You click the Place tool and then the new location for your object.


On Click
A 3D-model can be clickable just like a point of interest. In the On Click tab, you can choose what happens when the user clicks on the 3D-model. The options are open a Details Window, Embed code, Run script or the default action None.

Inspector
The inspector settings show the file size of the uploaded model and show if there are textures referenced in the file but not available. You can also change Normal and Culling settings for the uploaded model which can fix problems with surfaces with wrong triangle winding.

Attributes
These settings let you override the material defined in the uploaded 3d-model. You can set a color and opacity.

In-editor settings
This affects how your object appears in Object Manager.

Interactions
This tab lists the interactions that are currently affecting this object.