Explaining the Editor Interface

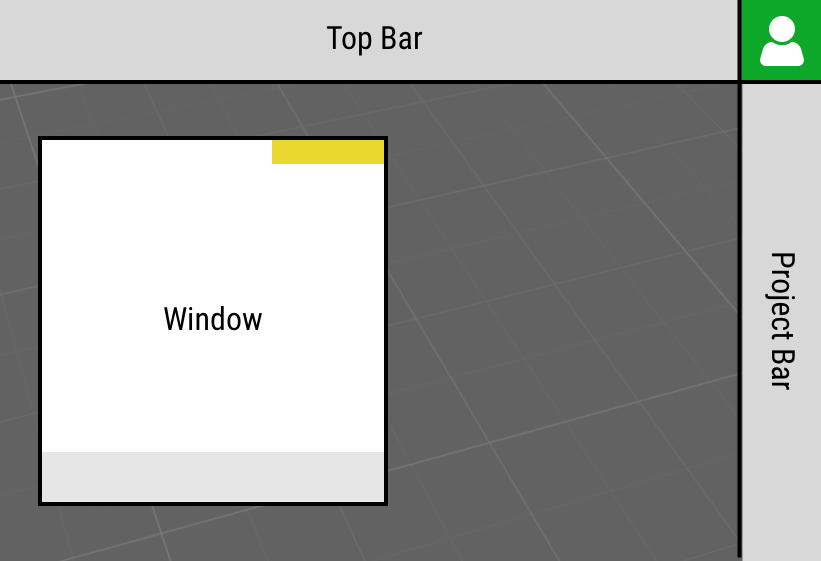
The Editor Interface consists of the two grey bars on the top and right side of the screen, as well as windows which are opened by the various Editor tools.

Anatomy of the Editor

Top Bar

Along the top of the screen, you will find different kinds of buttons.

  • Management – The first group of buttons on the left allow you to Create, Manage, Save, and Publish projects.
  • Top Bar Tools – Subsequent buttons on the left side are tools for Exporting, Map-rendering, and File Creation.
  • Help and Information – Finally, on the right side you’ll find text links for opening the the Help or Blog pages in a panel on the left side of the screen.

Project Bar

On the right side of the screen you’ll find the most important tools for creating your project.

  • Tools – Starting at the top, you will find icons for different OpenCities Planner tools and features. Choose the appropriate reference page or tutorial to learn more about each tool.
  • Object Manager – The bottom button opens Object Manager, a special tool for interacting with and organising project content.
  • Icon Caption Toggle Switch – The toggle switch shows or hides the tool captions. It can be useful to leave them on for new users.

Windows

You can distinguish Editor windows from the Project View because they all share the same style – solid white and grey with yellow highlights and a black border.

Here are the basic functions:

  • Move – Grab the handle to reposition a window.
  • Dock – You can dock some windows by clicking the dock button.
  • Close – Click the X-icon in the top-left corner to close the window/tool.

User and Account Settings

In the top-right corner there is a special tool for managing your personal Account, as well as your Organisation if you are an administrator.

PROTIP

Not sure what a certain button does? Hover and read the tooltip.

Menu