To add Search to your projects, you need to add a search database to your Instance Account.
You’ll need a Shape file with points and a text fields as attributes. If you want to enable multi-field searches, you can use several text fields as attributes and upload the same file several times with a different configuration for search field.
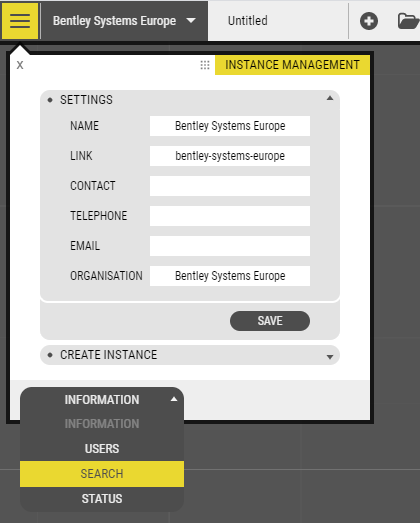
Start by going to Instance Management. Next, select Search from the drop down menu.
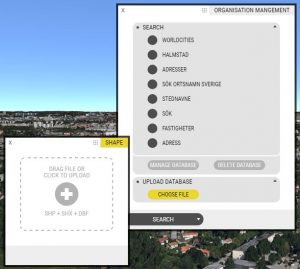
Click Choose File in the Upload Database section. Select the Shape file you want to use and make sure to upload .dbf, .shx, and .shp files.
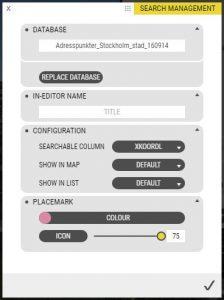
Protip: Give it an easy to understand name since it will be displayed when you select a database in Projects.
Pick the attribute you want to search in from Searchable column. Note, the field you pick must be a text field.
Show in Map and Show in List determines if a search hit should be shown in the map or list, respectively. This can be useful if you want to configure your search such that certain hits show i specific places. Thus, you can prevent the list or map from being cluttered with text or icons – depending on your use case. In most cases you can leave these settings on Default.
Configure the colour and icon for the search hit placemark. You can give each database it’s own distinct style for easy identification when you’re using several databases in a project.
Click the checkmark to save your configuration.
You can edit a database you created by clicking it in the list and then click Manage Database. If you update the shape file with new entries, you can re-upload the shapefile to update the database.
Next, you can enable search in a project from Interface Settings.


